Computer Died? Here’s What You Should Do Next
If your PC suddenly stops booting, a critical part like the PSU or motherboard is probably dead. Once you identify and fix/replace the faulty component, your PC should start working again.
I’ll take you through a step-by-step troubleshooting process to help you do this. You should start by confirming that your computer is actually receiving power.
Verify Power Supply Status
When you press your PC’s power button, there should be some signs of life (fans starting, LEDs, etc.). In this case, skip ahead to the next section.
But if the PC shows no signs of power or your PSU restarts within a few seconds of turning on, you’ve got a power supply problem.
Take a step-by-step approach and try powering on your PC after each step to diagnose the exact problem:
- First, ensure the PSU switch is on.
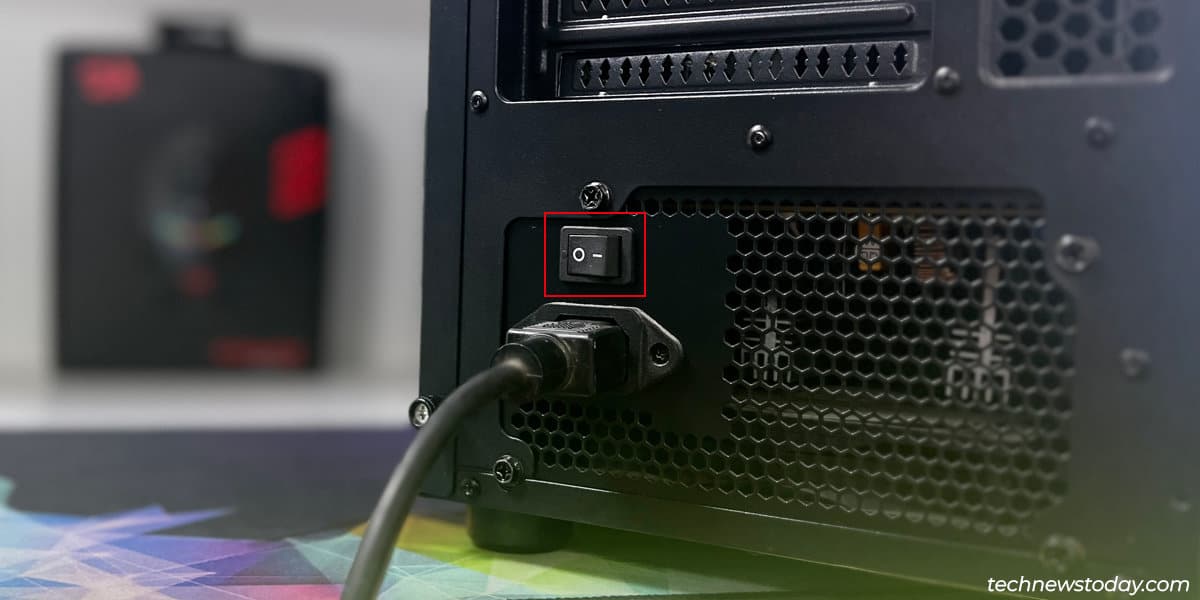
- Skip any power strips. Connect your PC directly to the outlet. Try another outlet, too.
- Perform a continuity test on the AC power cable to ensure it’s working. Swap the cable with a known good one if required.
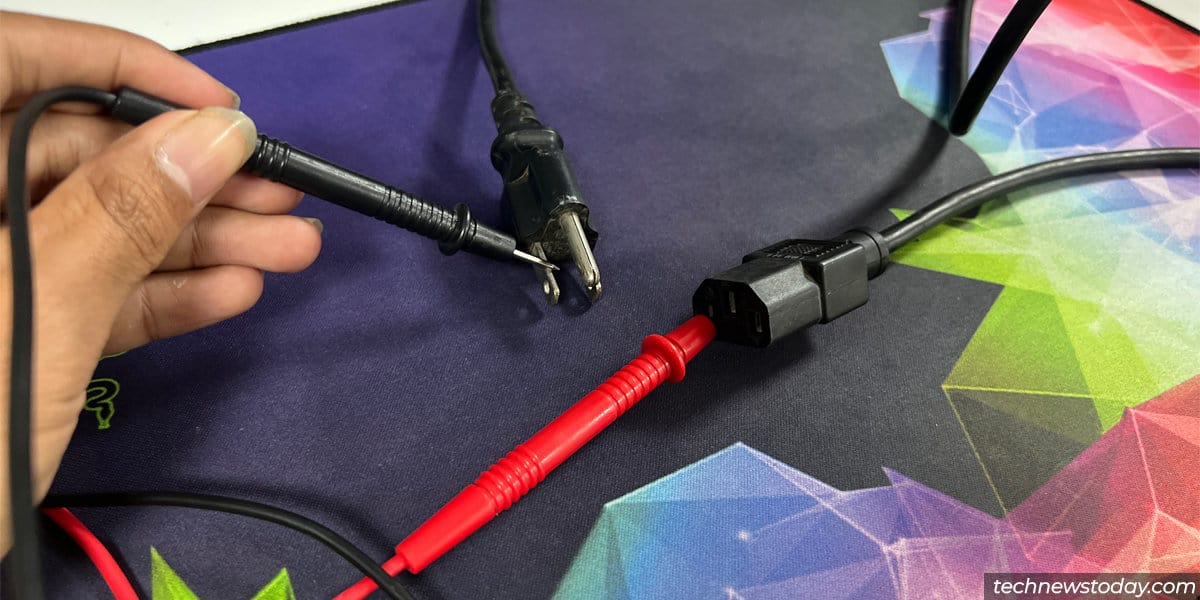
- Reseat the power cable and ensure it’s connected properly.
- Use a multimeter or a PSU tester to verify that your PSU is working fine.
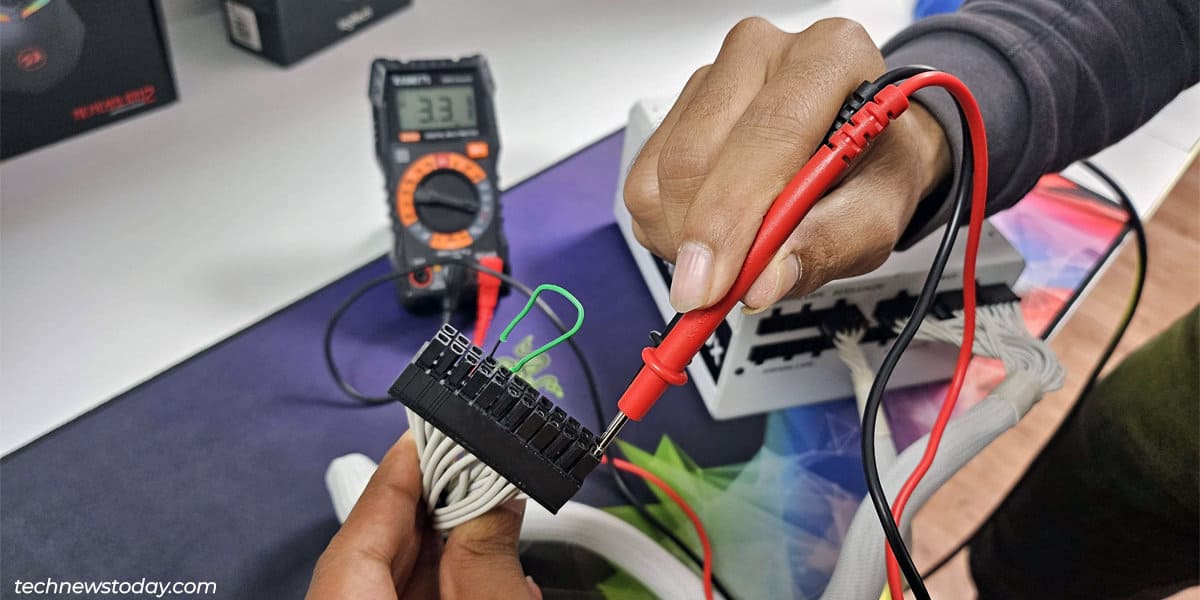
- Afterward, properly reseat all the PSU to motherboard connections.
- Refer to the manual, locate the power switch pins on the motherboard, and short them. If the issue is a faulty power button on your case, this will help.
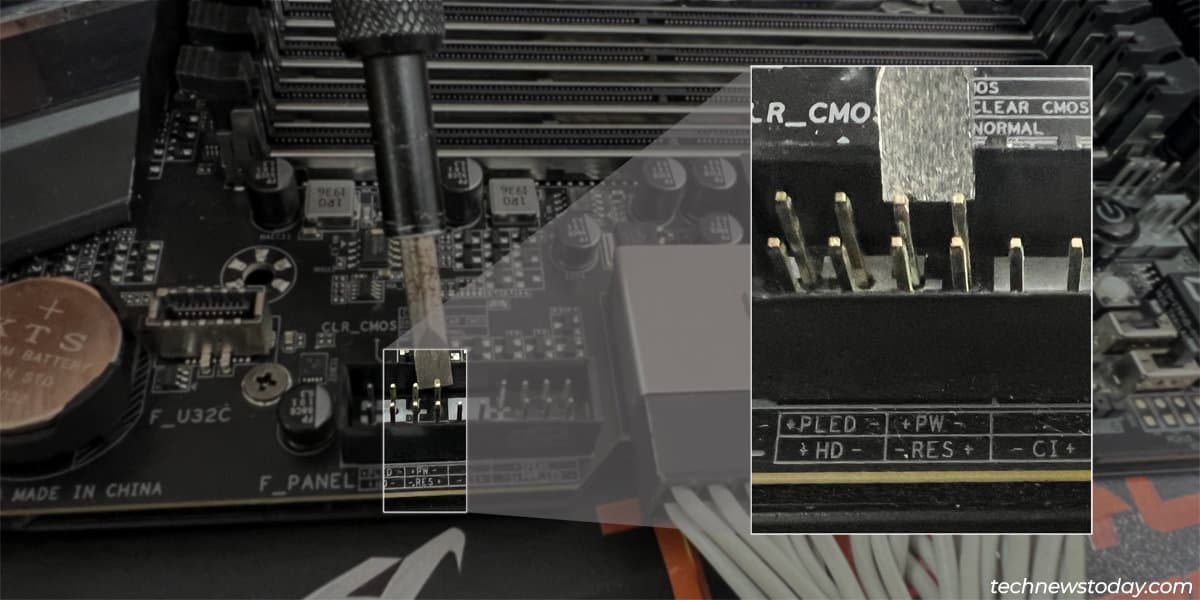
If everything seems good till this point, you’ll have to examine your motherboard next.
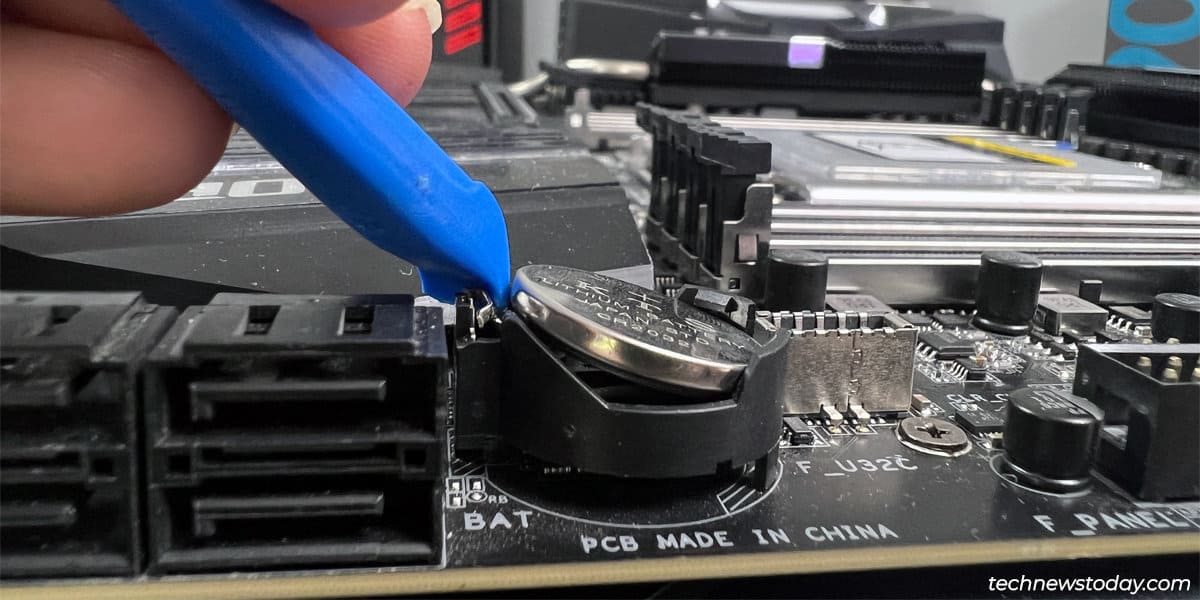
- Start by replacing the CMOS battery. Although this is not the intended behavior, dead CMOS batteries often prevent a PC from booting.
- Check if any motherboard components, like the pins, capacitors, chips, etc., are visibly damaged.
If your PC still doesn’t have power, temporarily replace the PSU and then the motherboard. This will let you identify the faulty component.
Check for Diagnostic Indicators
If your computer at least powers on and gets to POST, it’ll provide diagnostic info about why it’s unable to boot. This may be through audible beep codes, debug LEDs, or hex codes on the motherboard.
Debug LED
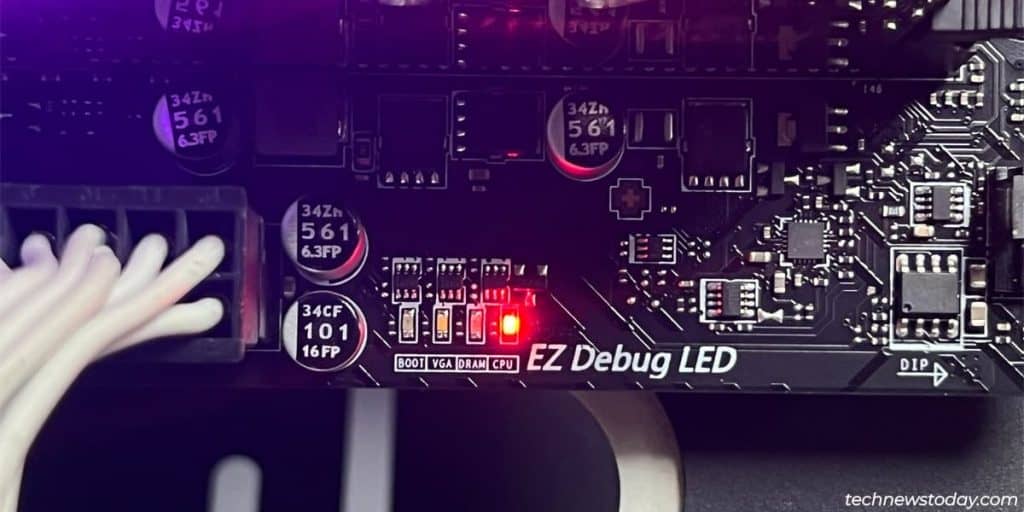
Most motherboards include basic debug LEDs to indicate problems with the core components:
If any of these LEDs are lit on your system, check our detailed guide on troubleshooting with debug LEDs to get your PC working again.
POST Codes
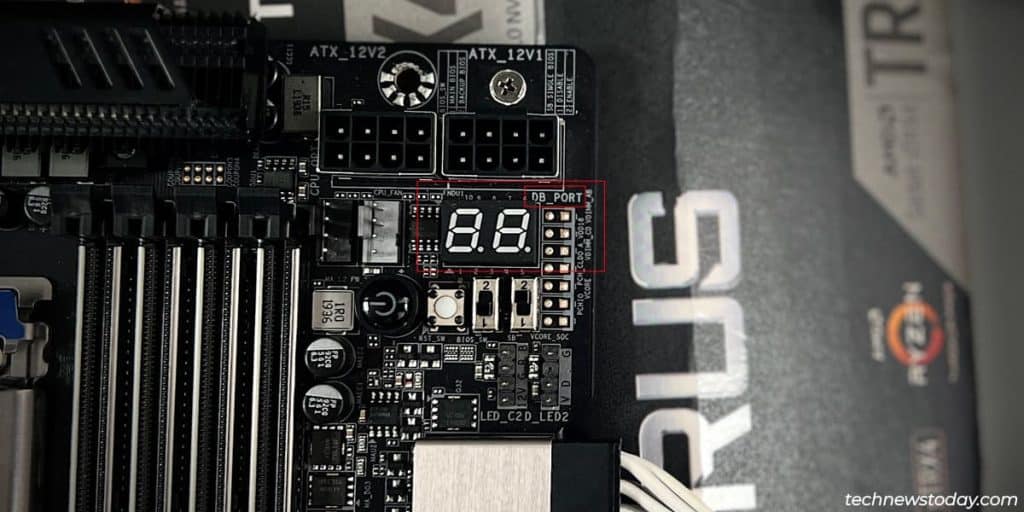
Higher-end motherboards include a hex code display, also called a Debug Port. These display hexadecimal codes (25, D9, etc.) that provide a much more helpful diagnosis of the problem.
On ASRock boards, these are called Dr. Debug codes instead, but their function is the same.
Look up the exact code on your motherboard’s support page if your board displays such codes. This will help you determine the problem and how to fix it.
Beep Codes
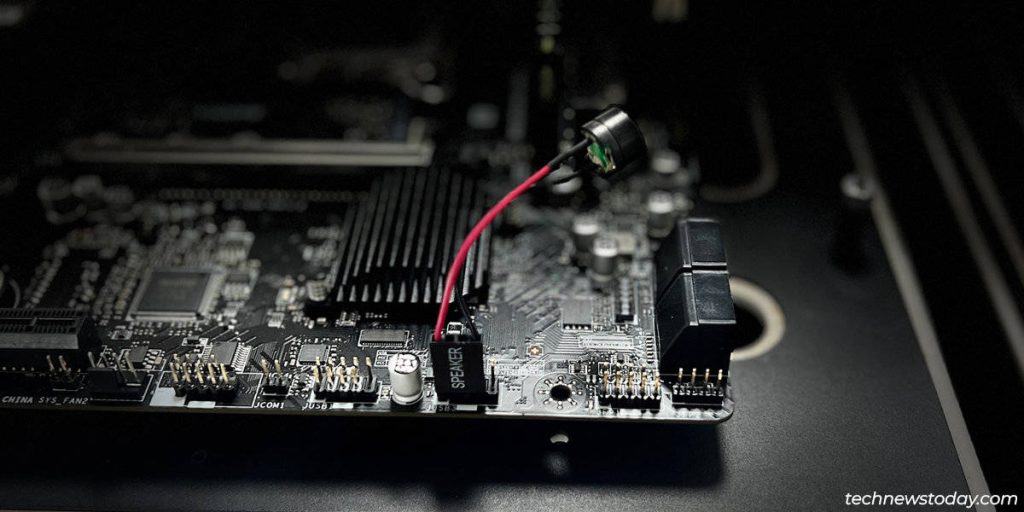
Some boards don’t include any visual diagnostic codes. In such cases, you can install a buzzer on the Speaker pins on your motherboard.
This speaker will beep in certain patterns to indicate boot issues. For instance, 1 long 2 short is a common pattern that indicates display problems (GPU, monitor, cables, ports, etc.).
If you use this method, we have dedicated articles for utilizing beep codes on different systems:
How To Deal with Dead Components
At this point, you’ve likely figured out which part is preventing your PC from turning on.
You can usually get parts like the RAM or GPU working again, while ones like the PSU must be replaced.
Here’s what I recommend for each component:
- PSU
Disconnect your PSU from the motherboard and test it separately. This is to account for Overcurrent Protection in case of a short circuit. If the PSU turns out to be faulty after all, the only option is to replace it. - RAM
Reseat the RAM modules, try different slots, and clean the sticks/slots. If the RAM problems persist, you may need to get new RAM modules. - GPU
Reseat the GPU and cables (display, power). Try another PCIe slot and monitor. If nothing helps, test using another GPU. - CPU
Check for bent CPU pins. If the pins seem fine, but you still get some CPU errors, you may have to replace the CPU entirely. - HDD/SSD
Verify that the boot drive is detected in the BIOS. If it’s not detected, check the connections. If it is detected, repair the boot sector or reinstall the OS. You can also connect the drive to another system if you need to recover the data beforehand. - Motherboard
You can try different slots on the motherboard for things like the RAM, GPU, and SSD. Resetting the CMOS is also often helpful. But besides this, repairing the board itself is beyond the scope of most people. So, you’ll probably need to replace the board.
Signs That Your Computer Is Dying
For future reference, you may find it useful to learn about the main signs that a dying PC shows. These include:


